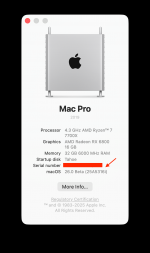
** macOS Tahoe Installation Guide for Asus X670E Gene **
(do not quote this guide in its entirely; post a link instead)
(do not quote this guide in its entirely; post a link instead)
Preamble
macOS Tahoe being the last version to support x86 processors, it seems appropriate to conclude the wonderful Hackintosh journey with a final build guide. This guide applies to the Asus X670E Gene (AM5 chipset), but parts of it are generic and apply to many other AMD-based motherboards. This guide uses OpenCore Configurator (OCC) 2.28.0.2 set to "1.0.5 Development Version". A new version of OCC should be released soon with support for 1.0.5 Release Version.
BIOS Version
This build guide also requires BIOS (firmware) version 3104 because ACPI patches (courtesy of CorpGhost and @fabiosun) are specific to this version. The ACPI patches may work with other 3xxx versions of BIOS, but have only been tested with BIOS 3104. macOS will simply not boot if appropriate ACPI patches are not applied.
USB Port Map
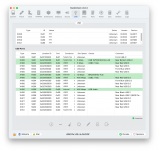
The following USB ports have been mapped using CorpNewt's latest USBMap script.
Unsupported Features
- macOS Tahoe removes AppleHDA support, but the Asus X670E Gene uses USB Audio, which remains somewhat compatible (microphone input jack may not work)
- Broadcom WiFi was discontinued in macOS Sequoia and it remains that way in Tahoe, but Broadcom Bluetooth continues to work natively
- Currently, OpenIntelWireless drivers (itlwm, AirportItlwm) are not working in macOS Tahoe
Installation Instructions
Configure OpenCore
The attached EFI folder should be suitable for many users, but others may need to modify it if they're using various Kernel Extensions (kexts) or SSDTs that are not included here. This EFI folder supports (a) Sequoia and (b) Tahoe.
Make the following changes to
config.plist located in the EFI/OC folder: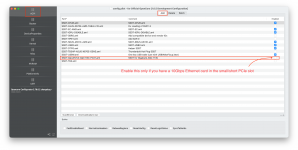
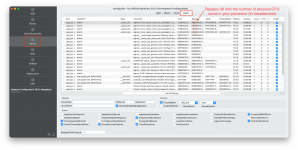
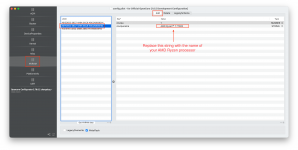
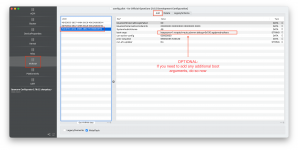
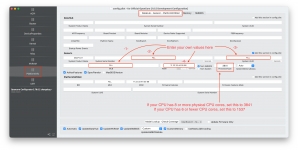
Test EFI Folder
Test the new EFI folder by attempting to boot your existing installation of macOS Sequoia. The EFI folder may also work on Sonoma. Proceed as follows:
- Copy the EFI folder to EFI partition of a USB flash drive
- Reboot the computer
- At the Asus splash screen, press F8 repeatedly until the BIOS boot menu (not the OpenCore boot menu) appears
- Select the USB flash disk from the BIOS boot menu, which will then bring up the OpenCore boot menu
- Select your Sequoia or Sonoma disk and see if it boots up properly
If the new EFI folder works properly, you may choose to (a) backup the existing EFI folder on your internal NVMe SSD and (b) copy the new EFI folder onto that NVMe SSD. This will avoid having to select F8 at least 5 or 6 times during the Tahoe installation process.
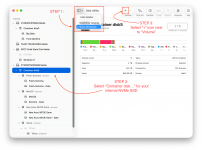
Because Tahoe is in early beta, it may be best to install it onto a separate APFS Volume on your NVMe SSD. This is easy to do as follows:
- Boot Sonoma or Sequoia and run Disk Utility
- Then follow the 3 steps shown here:
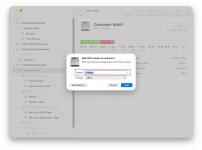
- Give the new APFS Volume a name and click Add as shown:
- OPTION 1:
- Download the Tahoe beta build from System Settings -> General -> Software Update if Beta Updates are enabled.
- In this case, the full Tahoe installer will download and run. When it does, do not install Tahoe on the default Sonoma or Sequoia drive, but select the option to choose a different drive, and pick the new APFS Volume that you created in the previous step. Let the installer run.
- There will be about 5 or 6 reboots.
- OPTION 2:
- Create a USB install disk by downloading macOS Tahoe using any method such as (a) gibMacOS, (b) direct download from Apple, etc.
- If using gibMacOS, double-click
InstallAssistant.pkgafter the download is complete. This will create an app in the Applications folder calledInstall macOS Beta - If downloading directly from Apple, copy the installer to the Applications folder
- Insert a 32GB or larger USB flash drive into an available USB 3.0 port, making sure that you're okay to delete everything on that drive!
- If the USB flash drive is not already formatted as
macOS Journaled, run Disk Utility and format it as such (and set Scheme to GUID Partition Map) - Open Terminal and type:
sudo /Applications/Install\ macOS\ Beta.app/Contents/Resources/createinstallmedia --volume /Volumes/USB-NAME- Replace USB-NAME with the actual name of the USB volume created in the earlier step
- When the process is complete, reboot the system, wait for the OpenCore boot menu, and select Install macOS Tahoe from the boot menu (this assumes you've copied the new EFI folder to EFI partition of internal NVMe SSD)
Update 28 July 2025:
- Modified USBMap.kext to include Thunderbolt USB-C ports. New EFI folder uploaded
- Intel WiFi works with
itlwmandHeliPortso config.plist has been modified to enableitlwm.kext; you'll need to download and installHeliPortfrom GitHub
Attachments
Last edited:


