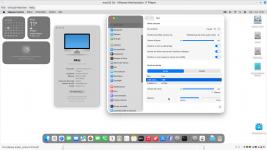
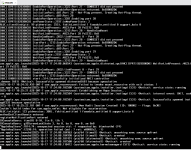
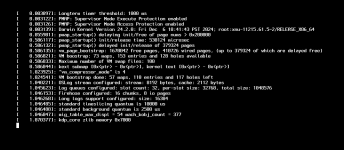
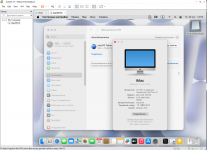
Mac OS install on AMD Ryzen/INTEL (VMWare) Opencore - Improved Performance - Works with Tahoe / Sequoia / Sonoma / etc

It looks like the system update is not seeing the 15.7.1 update and I have to trigger it from the App store.
That's true, but I haven't done any specific work to find out why. If anyone knows, please let us know.

For now, you need to download and run the update from the Apple Store or using gibmacos tool.
 
Last edited:
Hi, could you tell me how you applied the iCloud patches? When I turn on vmhide and start MacOS, it seems to stay on the logo interface and become unresponsive. After turning off vmhide, the apple service is no longer available.
Yes, I tested the latest version of vmhide.kext, and it crashes macOS Tahoe startup. With the patch, the problem is solved and ensures that Apple Services such as iCloud and Apple Store work.

I even did a quick test, and it also works with Sequoia. But you have to disable vmhide.kext startup, and if you want, you can also remove it.

In the same place where you add the patch to work with AMD processors (Kernel/Patch), you add these two new lines. There are two iCloud patches, one on each line.

You will find this patch already applied in this location if you open opencore 1.05, which I posted at this link:

https://forum.amd-osx.com/threads/m...with-tahoe-sequoia-sonoma-etc.4696/post-41807

<dict>
<key>Arch</key>
<string>x86_64</string>
<key>Base</key>
<string></string>
<key>Comment</key>
<string>iCloud Patch Part 1</string>
<key>Count</key>
<integer>1</integer>
<key>Enabled</key>
<true/>
<key>Find</key>
<data>aGliZXJuYXRlaGlkcmVhZHkAaGliZXJuYXRlY291bnQA</data>
<key>Identifier</key>
<string>kernel</string>
<key>Limit</key>
<integer>0</integer>
<key>Mask</key>
<data></data>
<key>MaxKernel</key>
<string></string>
<key>MinKernel</key>
<string></string>
<key>Replace</key>
<data>aGliZXJuYXRlaGlkcmVhZHkAaHZfdm1tX3ByZXNlbnQA</data>
<key>ReplaceMask</key>
<data></data>
<key>Skip</key>
<integer>0</integer>
</dict>
<dict>
<key>Arch</key>
<string>x86_64</string>
<key>Base</key>
<string></string>
<key>Comment</key>
<string>iCloud Patch Part 2</string>
<key>Count</key>
<integer>1</integer>
<key>Enabled</key>
<true/>
<key>Find</key>
<data>Ym9vdCBzZXNzaW9uIFVVSUQAaHZfdm1tX3ByZXNlbnQA</data>
<key>Identifier</key>
<string>kernel</string>
<key>Limit</key>
<integer>0</integer>
<key>Mask</key>
<data></data>
<key>MaxKernel</key>
<string></string>
<key>MinKernel</key>
<string></string>
<key>Replace</key>
<data>Ym9vdCBzZXNzaW9uIFVVSUQAaGliZXJuYXRlY291bnQA</data>
<key>ReplaceMask</key>
<data></data>
<key>Skip</key>
<integer>0</integer>
</dict>
 
That's true, but I haven't done any specific work to find out why. If anyone knows, please let us know.

For now, you need to download and run the update from the Apple Store or using gibmacos tool.
I can't seem to update to 15.7.1. It will download but fail upon installation.
How do I download the update as an ISO that I can mount and install?

edit: downloaded it from here: https://mrmacintosh.com/macos-sequoia-full-installer-database-download-directly-from-apple/
 
Last edited:
I can't seem to update to 15.7.1. It will download but fail upon installation.
How do I download the update as an ISO that I can mount and install?

edit: downloaded it from here: https://mrmacintosh.com/macos-sequoia-full-installer-database-download-directly-from-apple/

Here's how to create the macOS Sequoia ISO file on macOS.

Install the InstallAssistant.pkg file you downloaded from the internet and follow the steps below:

Open Terminal via Spotlight or by clicking Finder > Applications > Utilities > Terminal.
Copy and paste the following command into Terminal and press Return to create an empty disk image.
hdiutil create -o /tmp/Sequoia -size 17810m -volname Sequoia -layout SPUD -fs HFS+J

The size of the disk image (17810m) should be adequate for the macOS installer; this value may vary depending on the actual size needed.

Mount the disk image you created using the following command:
hdiutil attach /tmp/Sequoia.dmg -noverify -mountpoint /Volumes/Sequoia


Create the installation media by running the command below. Enter your administrator password when prompted.
sudo /Applications/Install\ macOS\ Sequoia.app/Contents/Resources/createinstallmedia --volume /Volumes/Sequoia --nointeraction

Ensure that the name of the macOS installer app (e.g., “Install macOS Sequoia.app”) is correct and matches what you have in your Applications folder.
Eject the disk image once you see the message "Install media now available at "/Volumes/Install macOS Sequoia".
hdiutil eject -force "/Volumes/Install macOS Sequoia"

Continue to run the command to convert the disk image to a CRD file.
hdiutil convert /tmp/Sequoia.dmg -format UDTO -o ~/Desktop/Sequoia

Execute the command below to rename the CDR file to an ISO file.
mv -v ~/Desktop/Sequoia.cdr ~/Desktop/Sequoia.iso

Delete the temporary disk image file with the following command:
rm -fv /tmp/Sequoia.dmg

The ISO image will be on the MacOS desktop, and if you want, you can use a USB flash drive or the network to transfer the file to your Windows host.
 
Last edited:
  • Like
Reactions: tangcla
I just double-clicked the pkg file, and then ran "Install macOS Sequoia" in the Applications.

Once installed, will I free up space by removing the application?
Yes, you have installed the macOS update installer. If you want, you can remove the InstallAssistant.pkg that was used, but Install macOS Sequoia.app will be installed in your list of macOS applications and can be used both to update your Mac and to create the ISO file.

Only after performing one of the above options can you then also remove Install macOS Sequoia from the list of applications.

1759788974756.png
 
Last edited:
  • Like
Reactions: tangcla
Yes, you have installed the macOS update installer. If you want, you can remove the InstallAssistant.pkg that was used, but Install macOS Sequoia.app will be installed in your list of macOS applications and can be used both to update your Mac and to create the ISO file.

Only after performing one of the above options can you then also remove Install macOS Sequoia from the list of applications.

View attachment 18144
Does it really take up 14.54GB?
 
Yes, if you create the ISO for the newest version of Sequoia, it is over 17 GB, and those for Tahoe are over 18 GB.
 
If you try to create a smaller size, such as 14GB, in Sequoia:

hdiutil create -o /tmp/Sequoia -size 14000m -volname Sequoia -layout SPUD -fs HFS+J

The file will be created, but when you try to use the command in the terminal:
sudo /Applications/Install\ macOS\ Sequoia.app/Contents/Resources/createinstallmedia --volume /Volumes/Sequoia --nointeraction

A message will appear telling you how much space is needed to create the dmg file in the image file that was mounted. This warning allows you to calculate how much you really need by simply adding to the value of 14.0 previously created.

Then you need to unmount the mounted drive and delete the dmg file with the command below to recreate it with the correct size:
hdiutil eject -force "Sequoia"
rm -fv /tmp/Sequoia.dmg

After that, restart the entire process to create the ISO.
 
Last edited:
  AdBlock Detected
Sure, ad-blocking software does a great job at blocking ads, but it also blocks some useful and important features of our website. For the best possible site experience please take a moment to disable your AdBlocker.