7800x3d and 5700 stuck on "AMDCPUSupport::start trying to init pci service..."

alexye2625

New member
AMD OS X Member
Jan 28, 2026
19
0
1
CPU:
7800x3d
PC SPECS:
ASUS ROG STRIX B650E-F GAMING WIFI
AMD Ryzen 7 7800X3D
AMD Radeon RX 5700
Corsair Vengeance 32gb 6000mt
CT1000P510SSD8

The old text got too long, I made some changes and got some good decent progress!
It would be great for any answers or fixes because this is my 5th day working on hackintosh.
 

Attachments

  • EFI.zip
    EFI.zip
    18.7 MB · Views: 1
  • IMG_0547.png
    IMG_0547.png
    12.4 MB · Views: 6
No need to add your GPU and SSD details to your config.plist or as an SSDT, as both will work in macOS without any additional helper kexts or SSDT's.

All you need for your GPU once Tahoe is installed, is WhateverGreen.kext and the agdpmod=pikera boot arg in your config.plist.

I use a Crucial P3 and a P5 NVME SSD in a couple of my Hack's and they work just fine without any additional input. NVMeFix.kext might help with the Power Management for the SSD, but isn't a deal breaker if not added to the /EFI/OC/Kexts folder and config.plist.

 
As you are trying to install Tahoe you need to follow some simple guidelines:
  1. Keep your kext folder as minimal as possible so you don't include any kexts that are going to cause issues.
  2. Do not use multiple WiFi kexts.
    1. None of which will work with your MediaTek WiFi/BT card.
    2. Do not add .zip folders to your EFI.
    3. Do not retain old config.plist when publishing your EFI folder.
  3. Generate a USB configuration that will work with your system and macOS Tahoe, i.e. includes the necessary new USB port naming for Tahoe.
    1. The UTBMap.kext you are using isn't compatible and to be honest is rubbish, as more than half the ports are missing from the kext.
    2. Using USBToolBox Tool in Windows means you need to install Sequoia first, but only if you get the USB port discovery correct!
  4. Do not use duplicate SSDT's.
    1. Only use SSDT's that were generated for your system, using Corpnewt's SSDTTime and your system ACPI tables, i.e, in Windows when macOS isn't available
This is a screenshot showing your current EFI folder, from post #1.

Screenshot 2026-01-31 at 12.25.28.png Current EFI folder contents

This is a screenshot showing what your EFI folder should look like when trying to install Tahoe (based on your current folder contents).

Screenshot 2026-01-31 at 12.41.19.png Slimmed down EFI folder, duplicates and non-essential elements removed.

You have a lot of boot arguments in your config.plist.
Some I have no idea why you need them (NVME related & Dart=0)
Others are duplicates (-v)
Some are not necessary if the correct option is selected in the bios (npci=0x3000), i.e. Above 4G Decoding is enabled in bios.

-v debug=0x100 keepsyms=1 -v agdpmod=pikera dart=0 amfi=0x80 nvme_core_runtime_pm=0 nvme-no-aspm-tyrant npci=0x3000

I would change this to the following:

-v debug=0x100 keepsyms=1 agdpmod=pikera
 
I happen to have the same Asus ROG Strix B650E-F Gaming WiFi motherboard, with a Ryzen 7 9700X CPU and RX 6700 XT dGPU running Windows 11 (only). I may look to install macOS on it at some point but don't plan to do so in the very near future.

Anyway, I have been messing around with the B650E-F Gaming system in Windows and generated a number of Bios Screenshots, SSDT's & patches, plus a UTBMap.kext. The later two will be explained in a couple of subsequent posts.

First, here are a few Bios screenshots from the system, showing some pertinent info.

260131164951.png260131165021.png260131165123.png260131165157.png260131165217.png260131165318.png260131165327.png260131165348.png260131165412.png

As you can see my system is running with Bios version 3067 dates 12/10/2024. If you are using a different Bios version some of the screens may not look the same.

Yes I did notice the high temperature for the CPU, this is caused by my previous CPU fan failing and while I am waiting for a new Corsair AIO fan to arrive I am using a less than stellar Thermallake fan, which runs like a plane is lifting off! While still not cooling the CPU.

The 1st image shows the main Bios information.
The 2nd shows my Memory OC EXPO I.
The 3rd should be used to Enable Above 4G Decoding in your system, if it isn't already Enabled.
The 4th to disable the AMD Integrated Graphics, if present. As it won't work in macOS.
The 5th when looking to Disable IOMMU option.
The 6th shows the USB4 controller is Disabled.
The 7th that the Thunderbolt controller is Disabled.
The 8th that SATA is set to AHCI.
The 9th shows the USB configuration.
 
Last edited:
So here are the screenshots I recorded while undertaking the SSDTTime custom SSDT generation for the Asus ROG STRIX B650E-F Gaming WiFi motherboard. These show the steps taken to generate each SSDT and the associated OC ACPI patches for this system.


1 Dump ACPI tables.pngMain screen for SSDTTime, Option P selected to obtain ACPI tables

2 ACPI tables added.pngMain screen revised following system dump of ACPI tables and SSDTTime attaching them for use.

3 SSDT-HPET selection.pngSSDT-HPET table selection

4 SSDT-HPET Patching.pngSSDT-HEPT patching, not the OC ACPI patches are also generated.

5 SSDT-EC patching.pngSSDT-EC table generated (SSDT-EC is different from Intel table of the same name)

6 SSDT-USBX patching.pngSSDT-USBX table generated (fairly generic but I prefer to use the one from SSDTTime)

7 SSDT-PLUG-ALT selection.pngSSDT-PLUG-ALT table generated

8 SSDT-USB-Reset patching.pngSSDT-USB-Reset table generated, note the need for USB controllers to be RENAMED.

9 SSDT-XOSI patching.pngSSDT-XOSI table generated using Option A, note again ACPI patches generated for OC.

10 SSDT-SMBus patching.png SSDT-SBUS-MCHC table generated using option C.

The result of this process is shown in the post below, along with a copy of the relevant SSDTTime Results folder.
 
Last edited:
Here is a screenshot showing the contents of the SSDTTime Results folder, viewed in Windows.

11 Results folder contents.png

Note the Disassembled (.dsl) tables are not to be copied to the /EFI/OC/ACPI folder. You only need to use the Machine Language Binary (.aml) tables in OpenCore.

The patches_OC.plist contains details of the SSDTs and relevant ACPI Patches. You can ignore the patches_Clover.plist.

The OEM folder is where SSDTTIme dumped the system ACPI tables.

Now, whether you choose to use these tables and patches is entirely down to you. But they are likely to be a better selection than those you are currently using.

If you were to use these tables this is how your EFI contents would look.

Screenshot 2026-01-31 at 17.34.57.png

It would be necessary to update the config.plist to include these tables and the associated ACPI patches.

Running the installer with Verbose text option would be sensible, as this would tell us if any of the tables and patches don't match/work with your setup.

Folder with the SSDTs etc is attached below.
 

Attachments

Using USBToolBox Tool in Windows is very similar to using Corpnewt's USBMap, as the Tool was initially based on USBMap script but ported to Windows.

1 Discover ports.png 
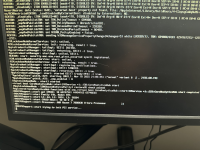
Fist screen after selecting option D 'Discover Ports' on the main screen

2 Discovered Ports.png Screen showing discovered ports, you should note that there are 26 x USB ports available in the system.

3 Select Ports - part 1.png Screen showing first 17 x USB Ports ready to build the Kext

4 Select Ports - part 2.pngScreen showing remainder of the USB ports

You should note that ports 6, 8, 13 & 18 are unused, not active in the build.

Ports 6 & 8 are Internal USB ports, which I assume are from an internal USB2 header that I am not using.

Ports 13 & 18 are the 2 x ports from the Internal Type-C header, which again I am not currently using, as there are sufficient Type-C ports on the rear I/O.

Name USB ports 1.png First screen showing the USB ports with 'Nicknames' to better identify each port and type.

Name USB ports 2.png Second screen showing the remainder of the USB ports with 'Nicknames' to better identify each port and type.

The 3 x screenshots (Snips) below show the contents of the UTBMap.kext/Contents/Info.plist, i.e. all the active ports with the port information.

UTBMap kext - info plist - part 1.png UTBMap kext - info plist - part 2.png UTBMap kext - info plist - part 3.png

It should be noted that this kext is not fit for purpose when it comes to installing Tahoe. It would work in Catalina up to and including Sequoia but due to changes made by Apple to the USB configuration in Tahoe, the kext won't work as it stands.

You should also note that USBToolBox Tool automatically comments out the 'Nickname', so it isn't used in macOS. No idea why it does this. It is easy to repair so the nicknames are used by removing the # from the front of the word '#comment' and then Capitalising the word so it now looks like this 'Comment'. The nicknames should now appear in Hackintool.

A copy of the UTBMap.kext as shown and configured above is attached for your pleasure. Again whether you use this kext or not is entirely down to you.

If you do use it, remember to add USBToolBox.kext to your OC/Kexts folder along with the UTBMap.kext.

You do not need UTBDefault.kext when using a custom kext such as is attached.
 

Attachments

This is what the above UTBMAp.kext looks like when imported in to Hackintool's > USB tab.

Note the table below is sorted by 'LocationID' column, to keep the USB ports under each Controller grouped in port order (logically).

Screenshot 2026-01-31 at 18.09.05.png

Unfortunately, Hackintool failed to Export a Tahoe compatible USBMap.kext. It only included 20 of the ports and didn't keep them to the 3 x USB controllers that are present.

It got the 10 x USB ports under the XHC controller correct. But only included 10 x USB ports from the XHC0 Controllers, when there are 16 x USB ports across the 2 x XHC0 controllers. So using it would be unwise in my opinion. So installing Sequoia would be a better option with regards the current USB configuration.
 
Try this EFI folder, it includes the revised SSDT's and patches but not the UTBMap.kext.

See how this goes.
 

Attachments

I booted into macos.dmg and after like 10 seconds it sends me back to the opencore picker. I also checked the logs and theres nothing except 300k characters of nothing. If you could help me with this that would be awesome!
 
Are you using the EFI folder I provided above in post #11 or a different folder to boot to the OS?

Not sure what would cause the system to kick you out of the OS, without giving some reason or message when you boot back into the OS.
 
I am using your EFI and it just doesnt seem to boot into macos.dmg and kicks me back into the picker but one of the logs did say "〰〺〰〠㨰〰‰䍏㩂䰠慯䥤慭敧映楡敬⁤‭湕畳灰牯整൤"
 
Can you post a copy of the message in English (UK) so I can read it. Apple’s translation app can’t read or translate what you posted.
 
Thats what it said straight from the log and i asked gemini to translate it since it was encrypted in UTF-16 Big endian. it translates to "OCB: LoadImage failed - Unsupported"
 
Check the SMBIOS you are using is supported in macOS Tahoe.
Apple dropped support for a lot of systems with the release of Tahoe, so we as AMD Hackintosh users need to use MacPro7,1.
Run the NvramReset option from the OpenCore boot screen. This is essential if you have recently changed the SMBIOS to a Tahoe supported SMBIOS, i.e. changed from iMacPro1,1 to MacPro7,1.
 
You need to check that you don’t have any other EFI folders present on the drive(s) installed in your computer. As that error is normally caused by using an incompatible SMBIOS when installing a new version of macOS.
 
  AdBlock Detected
Sure, ad-blocking software does a great job at blocking ads, but it also blocks some useful and important features of our website. For the best possible site experience please take a moment to disable your AdBlocker.