AudioGod's ASUS ROG STRIX X570-E GAMING - Big Sur & Monterey Beta - OpenCore 0.7.4 EFI

stotes

New member
AMD OS X Member
Joined
Jan 2, 2022
Messages
20
I used your EFI, along with my Platform Info, set my cores, and removed your usb map and the 6950 SSDT, and dropped it onto a stick with a copy of monterey on it. I booted the stick, and just for shits and giggles, decided to see if my 1Tbv drive from my VM would boot (had the same platform info). Well, it did!

So thankyou mate - I have a bit of work to do like mapping my usb ports, etc, but got it to a point now where is sleeps and wakes, and even unlocks with the apple watch (I have a native broadcom mini card which I swapped out with the intel).

FYI my board is an Asus X570 Gaming-E Wifi II, 5900X CPU and 6900X Asus gpu. The rest is the usual fluff like a heap of ram, two nvme's for Win and Mac, and a AQ107 10GBe card sitting atop the tower awaiting installation.

Will this update to Ventura or should I do a fresh install into a new APFS container and migrate my stuff?
Also would you mind sharing your EFI?
 

vk2emp

Member
AMD OS X Member
Joined
May 17, 2020
Messages
39
Also would you mind sharing your EFI?
It wasn't that difficult - I used a Fenvi HB1200 from memory. It was originally in my MSI X570 ACE which stopped working properly for hackintoshing around Monterey, so I retired it to server duties and slapped a 5500 in it.

You first (carefully) remove the plastic cover behind the I/O sheild (the one with the ROG logo). Gently pull straigh up on the wire for the RGB and it will pop out. For whatever reason I couldn't get the actual i/O sheild off, but it had enough play in it to remove the silver box the wifi module lives in. There are two small silver screws on the back side of the motherboard - remove them to free up the module, then, pull straight up like a pcie card. If your I/O shield won't come off, you can lift it ehough to clear the slot and slide the card out towards the CPU socket.

Dismantle the box with the one screw holding it together, and using a plastic spudger, pop the antenna wires and lever the card off the adhesive pad. A pair of tweezers is your friend when putting those awful antenna connectors onto the new card. Do this befor putting it bac into place atop the adheseive pad. Close the box up, fanagle your I/O sheild aside to slot it in and you are good to go.

My EFI is a mish mash of Audiogods and Johns. Open the config.plist with OCAT or ProperTree, and add your platform info. Remember to set your core count in Kernel>Patches. If you have a 5900X then you don't need to do this. It is up to the latest opencore as of this posting, 0.8.6. As you can see I still have work to do - cpu is reporting as a Xeon.

EDIT:Thats because I didn't follow my own advice. Setting the correct number of cores in config.plist Kernel>Patches now shows an AMD Ryzen 9. So EVERYONE using this EFI will need to set their core count unless they have a 16 core CPU.

There are a pile of extra kexts I just realised that arent needed for the fenvi card. You can go ahead and delete them (just cross reference which are not enabled using OCAT and delete the disabled ones.

This EFI works with both Monterey and Ventura. Firmware version is the latest offering from Asus. (from memory 4404) Don't forget before installing to reset the NVRAM. On my first attempt I forgot to do this and I got a german installer. :)

Open RGB Doesnt like my Lian Li Fans, shame, guess I am stuck with rainbow until I get windows installed :)

Another thing, if you have a non apple bluetooth keyboard such as my Logitech MX Keys for mac, use the reciever that came with the keyboard. You'll get control of the bios that way, as well as being able to type your password the moment the login screen appars, instead of waiting for bluetooth to poll the keyboard.


Attachments

  • EFI.zip
    11.5 MB · Views: 14
Last edited:

coralding

New member
AMD OS X Member
Joined
Oct 31, 2021
Messages
28
Build Spec
  • CPU: AMD Ryzen 9 5950X
  • Motherboard: 4x ASUS ROG STRIX X570-E
  • RAM: 4x G-Skill 16GB 3600MHz
  • GPU: AMD Radeon RX 5700XT
  • Case: Antec P101S
  • M2 NVME: 1 Hynix 960G, 1 WD SN850 1Tb
  • Wifi-Bluetooth: intel AX200
  • Bootloader: OC 0.8.6
  • SMBios: MacPro 7,1
  • Using Opencore 0.8.3 works fine, but when update to OC 0.8.6 Show a lot shema loss, and stuck on EB. Tried several time, I have stay on OC 0.8.3 With Montenery 12.6.1, if update to Venture 13.0.1, after restart stuck on EB.
  • My usingACPI、Drivers、

  • Kexts is here.

    http://www.scythe.com.cn/
 

Attachments

  • EFI_0.86.rar
    25.9 MB · Views: 10

Galve2000

Donator
Donator
AMD OS X Member
Joined
Sep 19, 2020
Messages
234
Using Opencore 0.8.3 works fine, but when update to OC 0.8.6 Show a lot shema loss, and stuck on EB. Tried several time, I have stay on OC 0.8.3 With Montenery 12.6.1, if update to Venture 13.0.1, after restart stuck on EB.

I think I have the same problem.

I was bored so I thought i'd face my fear of upgrading form OC 0.80 to 0.86 -- I cheated and used OCAuxiliaryTools to do this.

the process was very str8 forward and seemed to work fine.

the only thing I have lost is pressing spacebar at boot doesn't give me the option of reseting NVRAM.. which I would very much like to do.

I also had to download a newer version of AMDPowerGardget.app -- but thankfully the associated necessary kext was either updated by OCAuxiliaryTools automatically or it didn't need updating.

Anyway,

emboldened by a bit of success updating OC, I thought I might just full speed ahead Software Update to Ventura 13.0.1

but I too seem to get stuck very early in the boot process.


thankfully (particularly since I have yet to (properly) backup my systemI can bypass the "installer" and simply boot into Monterey 12.6

I am typing this post from my 5950X Rysentosh, so all is not lost.

so my questions:

1. how do I get Reset NVRAM to show at boot?

2. Why Can't I install Ventura?


any help you can provide is much appreciated.
 
Last edited:

ExtremeXT

Donator
Donator
Joined
Aug 7, 2022
Messages
843
It wasn't that difficult - I used a Fenvi HB1200 from memory. It was originally in my MSI X570 ACE which stopped working properly for hackintoshing around Monterey, so I retired it to server duties and slapped a 5500 in it.
Monterey and Ventura now work on MSI 500 series motherboards.
 

fabiosun

Guru
Guru
AMD OS X Member
Joined
Oct 9, 2022
Messages
470
spacebar at boot doesn't give me the option of reseting NVRAM.
for this you have to update and add also a UEFI driver (ResetNvramEntry.efi)
for Ventura problem instead you have to update all your patches with latest on AMD-OSX Vanilla GitHub
 

fabiosun

Guru
Guru
AMD OS X Member
Joined
Oct 9, 2022
Messages
470
No you have to update maxkernel(22.99.99) of your kernel patches and update opencore and all your kext
I suggest to download the patches again or use OCAT preset to update them
 
Last edited:

Galve2000

Donator
Donator
AMD OS X Member
Joined
Sep 19, 2020
Messages
234
OMG ladies and gents...

we have Ventura 13.0.1

Screenshot 2022-11-18 at 12.37.49 AM.png

I think I suffered like 4 heart attacks while all of this was updating...

and I have lost access to my Windows 11 NVME (it won't boot)

but considering I had not booted (prior to today) into Windows 11 since sometime in July.. it hardly matters.

YAY!

PS I still can't figure out how to enable resetNVRAM by pressing spacebar the way I had it with OC 0.8.0

a step by step guide would be most appreciated.
 

Edhawk

Guru
Guru
Joined
May 2, 2020
Messages
2,393
There was a change in how OpenCore facilitates ResetNvram.
  • In OC 0.8.0 ResetNvram was an option in the config.plist.
  • In 0.8.x the ResetNvram option was removed and replaced by ResetNvram.efi driver.
So to add the ResetNvram option to the OC boot screen you now need to add the ResetNvram.efi driver to your /EFI/OC/Drivers folder and have a companion entry for the driver in your config.plist.
 

Galve2000

Donator
Donator
AMD OS X Member
Joined
Sep 19, 2020
Messages
234
So to add the ResetNvram option to the OC boot screen you now need to add the ResetNvram.efi driver to your /EFI/OC/Drivers folder and have a companion entry for the driver in your config.plist.

Will OC Snapshot add the ResetNVRAM.efi to my Config.plist if it is in the Drivers folder? or Is there some more complicated procedure for adding it?

also, I only have a copy of ResetNVRAMEntry.efi in the "stock" OC 0.8.6 EFI I downloaded. is this the same thing?

Thanks again for yr help.
 

johnlietzke

Well-known member
AMD OS X Member
Joined
Jul 7, 2021
Messages
305
I have the same MOBO, and can't for the life of me get Bluetooth/Wifi working. How did you swap out the mini card, which model card did you buy?
I use the native Apple Broadcom card. It works with any Kexts. The only things not working are SideCar and Continuity Camera.
 

johnlietzke

Well-known member
AMD OS X Member
Joined
Jul 7, 2021
Messages
305
I used your EFI, along with my Platform Info, set my cores, and removed your usb map and the 6950 SSDT, and dropped it onto a stick with a copy of monterey on it. I booted the stick, and just for shits and giggles, decided to see if my 1Tbv drive from my VM would boot (had the same platform info). Well, it did!

So thankyou mate - I have a bit of work to do like mapping my usb ports, etc, but got it to a point now where is sleeps and wakes, and even unlocks with the apple watch (I have a native broadcom mini card which I swapped out with the intel).

FYI my board is an Asus X570 Gaming-E Wifi II, 5900X CPU and 6900X Asus gpu. The rest is the usual fluff like a heap of ram, two nvme's for Win and Mac, and a AQ107 10GBe card sitting atop the tower awaiting installation.

Will this update to Ventura or should I do a fresh install into a new APFS container and migrate my stuff?
No need to reinstall.
 

Edhawk

Guru
Guru
Joined
May 2, 2020
Messages
2,393
Will OC Snapshot add the ResetNVRAM.efi to my Config.plist if it is in the Drivers folder? or Is there some more complicated procedure for adding it?

also, I only have a copy of ResetNVRAMEntry.efi in the "stock" OC 0.8.6 EFI I downloaded. is this the same thing?
Yes, the ProperTree Clean Snapshot will add the driver to the config.plist if it is present in the /OC/Drivers folder.

Yes, the driver is present in the Stock OC 0.8.6 /EFI/OC/Drivers folder. You should make sure you are using the driver from the version of OC you are using. Mixing drivers from different versions of OC can cause unnecessary issues.
 

lukakeiton

Member
AMD OS X Member
Joined
Jul 26, 2020
Messages
87
Build Spec
  • CPU: AMD Ryzen 9 3900X
  • Motherboard: 4x ASUS ROG STRIX X570-E
  • RAM: 4x Corsair Vengance 16GB 3600MHz
  • GPU: AMD Radeon RX 6950XT
  • Case: NZXT 710
  • M2 NVME: 2x Samsung 980 PRO 2TB
  • Wifi-Bluetooth: Broadcom BCM4360
  • Cooling: Corsair H115i ELITE RGB
  • Bootloader: OC 0.8.6
  • SMBios: MacPro 7,1
ACPI SSDT's - All bypassed for other OS
  • SSDT-HPET.aml (HPET _CRS (Needs _CRS to XCRS Rename))
  • SSDT-PLUG.aml (CPU power management)
  • SSDT-SBRG.aml (Correcting EC, RTC memory & IRQ conflicts)
  • SSDT-SBUS-MCHC.aml (SMBus Support)
  • SSDT-USBX.aml (USB power tables)
  • SSDT-GPU-6950XT.aml (GPU Spoof through bridge)
Kexts
  • Lilu.kext v1.6.2
  • VirtualSMC.kext v1.3.0
  • WhateverGreen.kext v1.6.1
  • AppleALC.kext v1.7.6
  • AirportBrcmFixup.kext v2.1.6
  • SmallTreeIntel82576.kext v1.0
  • LucyRTL8125Ethernet.kext v1.1.0
  • AppleMCEReporterDisabler.kext
  • BlueToolFixup.kext v2.6.4
  • BrcmFirmwareData.kext v2.6.4
  • BrcmPatchRAM3.kext v2.6.4
  • AMDRyzenCPUPowerManagement.kext v0.7.1
  • SMCAMDProcessor.kext
  • RestrictEvents.kext v1.0.9
  • NVMeFix.kext v1.1.0
  • RadeonSensor.kext v0.3.1
  • SMCRadeonGPU.kext v0.3.1
  • USBMap.kext - ASUS ROG STRIX X570-E with wifi-bluetoth pcie card
  • IntelBTPatcher.kext v2.2.0 (Disabled by default)
  • IntelBluetoothFirmware.kext v2.2.0 (Disabled by default)
BIOS Settings
  • Enter BIOS -> Press Delete -> Enter Setupv1.0
  • Exit -> Load Optimised Defaults
  • Ai Tweaker -> Ai Overclock Tuner -> D.O.C.P.
  • Advanced -> APM Configuration -> Power On By PCIe -> Disabled
  • Advanced -> PCI Subsystem Settings -> Above 4G Decoding -> Enabled
  • Advanced -> PCI Subsystem Settings -> Re-Size BAR Support -> Disabled
  • Advanced -> USB Configuration -> Legacy USB Support -> Auto or Disabled
  • Boot -> Boot Configuration -> Fast boot -> Disabled
  • Boot -> CSM -> Launch CSM -> Disabled
  • Boot -> Secure boot -> OS Type -> Windows UEFI mode
  • Boot -> Secure boot -> Key Management -> Clear Secure Boot Keys
Install Notes
Using PlistEdit Pro, Xcode or ProperTree add your details by modifying the following
1126595787_Screenshot2020-01-16at19_25_01.png.890a13d93c1ce4f42ee7dedb6d156e1e.png

WIFI / BLUETOOTH

IF NOT USING A BROADCOM INTEL-WIFI PCI-E CARD

If you are using internal Intel wifi-bluetooth, use Intel wifi-bluetooth kext. Just enable the two intel-related entries under Kernel -> Add and disable the two entries which start with Brcm.

DO NOT USE MY USB MAP KEXT due to different mapping, this one is only for people who had broadcom wifi-bluetooth pcie card. If you have it into USB3_4, then, change it to USB1_2. Use the provided one

GPU

IF NOT USING AMD RX 6X50 (XT) SERIES

Remove EFI/OC/ACPI/SSDT-GPU-6950XT.aml and remove it from conflig.plist ( ACPI -> Add ).

IF NOT USING AMD RDN2 GRAPHIC CARD

Remove agdpmod=pikera from bootflags.

CPU

IMPORTANT - PATCH INFO FOR SETTING THE CORRECT CORE COUNT FOR YOUR CPU
Core Count patch needs to be modified to boot your system. Find the two algrey - Force cpuid_cores_per_package patches and alter the Replace value only.

Changing BA000000 0000/BA000000 0090* to BA <CoreCount> 0000 0000/BA <CoreCount> 0000 0090* substituting <CoreCount> with the hexadeciamal value matching your physical core count.

Note: The three different values reflect the patch for different versions of macOS. Be sure to change all three if you boot macOS 10.13 to macOS 12

See the table below for the values matching your CPU Core Count.

CoreCountHexadecimal
6 Core06
8 Core08
12 Core0C
16 Core10
32 Core20
So for example a 6 Core 5600X would result in these replace values, BA 06 0000 0000/BA 06 0000 0090
Or a 12 Core 5900X that I have it setup as standard would result in these replace values, BA 0C 0000 0000/BA 0C 0000 0090

EFI DOWNLOAD
 

Attachments

  • EFI.zip
    18.3 MB · Views: 28
Last edited:

lukakeiton

Member
AMD OS X Member
Joined
Jul 26, 2020
Messages
87
Build Spec
  • CPU: AMD Ryzen 9 3900X
  • Motherboard: 4x ASUS ROG STRIX X570-E
  • RAM: 4x Corsair Vengance 16GB 3600MHz
  • GPU: AMD Radeon RX 6950XT
  • Case: NZXT 710
  • M2 NVME: 2x Samsung 980 PRO 2TB
  • Wifi-Bluetooth: Broadcom BCM4360
  • Cooling: Corsair H115i ELITE RGB
  • Bootloader: OC 0.8.6
  • SMBios: MacPro 7,1
ACPI SSDT's - All bypassed for other OS
  • SSDT-HPET.aml (HPET _CRS (Needs _CRS to XCRS Rename))
  • SSDT-PLUG.aml (CPU power management)
  • SSDT-SBRG.aml (Correcting EC, RTC memory & IRQ conflicts)
  • SSDT-SBUS-MCHC.aml (SMBus Support)
  • SSDT-USBX.aml (USB power tables)
  • SSDT-GPU-6950XT.aml (GPU Spoof through bridge)
Kexts
  • Lilu.kext v1.6.2
  • VirtualSMC.kext v1.3.0
  • WhateverGreen.kext v1.6.1
  • AppleALC.kext v1.7.6
  • AirportBrcmFixup.kext v2.1.6
  • SmallTreeIntel82576.kext v1.0
  • LucyRTL8125Ethernet.kext v1.1.0
  • AppleMCEReporterDisabler.kext
  • BlueToolFixup.kext v2.6.4
  • BrcmFirmwareData.kext v2.6.4
  • BrcmPatchRAM3.kext v2.6.4
  • AMDRyzenCPUPowerManagement.kext v0.7.1
  • SMCAMDProcessor.kext
  • RestrictEvents.kext v1.0.9
  • NVMeFix.kext v1.1.0
  • RadeonSensor.kext v0.3.1
  • SMCRadeonGPU.kext v0.3.1
  • USBMap.kext - ASUS ROG STRIX X570-E with wifi-bluetoth pcie card
  • IntelBTPatcher.kext v2.2.0 (Disabled by default)
  • IntelBluetoothFirmware.kext v2.2.0 (Disabled by default)
BIOS Settings
  • Enter BIOS -> Press Delete -> Enter Setupv1.0
  • Exit -> Load Optimised Defaults
  • Ai Tweaker -> Ai Overclock Tuner -> D.O.C.P.
  • Advanced -> APM Configuration -> Power On By PCIe -> Disabled
  • Advanced -> PCI Subsystem Settings -> Above 4G Decoding -> Enabled
  • Advanced -> PCI Subsystem Settings -> Re-Size BAR Support -> Disabled
  • Advanced -> USB Configuration -> Legacy USB Support -> Auto or Disabled
  • Boot -> Boot Configuration -> Fast boot -> Disabled
  • Boot -> CSM -> Launch CSM -> Disabled
  • Boot -> Secure boot -> OS Type -> Windows UEFI mode
  • Boot -> Secure boot -> Key Management -> Clear Secure Boot Keys
Install Notes
Using PlistEdit Pro, Xcode or ProperTree add your details by modifying the following
1126595787_Screenshot2020-01-16at19_25_01.png.890a13d93c1ce4f42ee7dedb6d156e1e.png

WIFI / BLUETOOTH

IF NOT USING A BROADCOM INTEL-WIFI PCI-E CARD

If you are using internal Intel wifi-bluetooth, use Intel wifi-bluetooth kext. Just enable the two intel-related entries under Kernel -> Add and disable the two entries which start with Brcm.

DO NOT USE MY USB MAP KEXT due to different mapping, this one is only for people who had broadcom wifi-bluetooth pcie card. If you have it into USB3_4, then, change it to USB1_2. Use the provided one

GPU

IF NOT USING AMD RX 6X50 (XT) SERIES

Remove EFI/OC/ACPI/SSDT-GPU-6950XT.aml and remove it from conflig.plist ( ACPI -> Add ).

IF NOT USING AMD RDN2 GRAPHIC CARD

Remove agdpmod=pikera from bootflags.

CPU

IMPORTANT - PATCH INFO FOR SETTING THE CORRECT CORE COUNT FOR YOUR CPU
Core Count patch needs to be modified to boot your system. Find the two algrey - Force cpuid_cores_per_package patches and alter the Replace value only.

Changing BA000000 0000/BA000000 0090* to BA <CoreCount> 0000 0000/BA <CoreCount> 0000 0090* substituting <CoreCount> with the hexadeciamal value matching your physical core count.

Note: The three different values reflect the patch for different versions of macOS. Be sure to change all three if you boot macOS 10.13 to macOS 12

See the table below for the values matching your CPU Core Count.

CoreCountHexadecimal
6 Core06
8 Core08
12 Core0C
16 Core10
32 Core20
So for example a 6 Core 5600X would result in these replace values, BA 06 0000 0000/BA 06 0000 0090
Or a 12 Core 5900X that I have it setup as standard would result in these replace values, BA 0C 0000 0000/BA 0C 0000 0090

EFI DOWNLOAD
Guys, I made a mistake doing new config.plist. I have set csr-active-config to string with es:87. This should be data with value 00000000.

I apologise for the inconvenience.
 

Galve2000

Donator
Donator
AMD OS X Member
Joined
Sep 19, 2020
Messages
234
SSDT-GPU-6950XT.aml (GPU Spoof through bridge)

did you need to spoof the vender and device ID?

I wonder if your SSDT will work with my PowerColor 6900XT. someone in the discord mentioned that my SSDT was "suboptimal"
 

lukakeiton

Member
AMD OS X Member
Joined
Jul 26, 2020
Messages
87
did you need to spoof the vender and device ID?

I wonder if your SSDT will work with my PowerColor 6900XT. someone in the discord mentioned that my SSDT was "suboptimal"
This SSDT is only made to name pci-bridge device and inject properties. I have red Dortania guide again and this method is the recommended one.

Probably someone said that because I inject device id and properties through SSDT instead DeviceProperties in OC.

If you have the same motherboard and same bios revision, you are good to go modifying name inside SSDT.

Otherwise, you can build yours using these steps:


Geekbench 5.4.5 results:


Last edited:

lukakeiton

Member
AMD OS X Member
Joined
Jul 26, 2020
Messages
87
I have decided to remap all USBs and I found something interesting. I still continue doing tests, so this is for testers only.

I realized internal Intel Bluetooth is located at 0x20600000 on XHC1 so I decided to delete this port. The result is Intel bluetooth is not loaded on macOS, so there is no need to disable on BIOS and you can use it on other OS.

There are a couple of things that I have not tested yet, like USB Type C 2.0 mapping.

With respect comments and considering there are people non English (like me), I have followed a numeric structure as follows


So, I have made two variants of USBMap.kext, if you are using Intel bluetooth and wifi, you need to use USBMap(with Intel BT).kext (DO NOT FORGET TO RENAME TO USBMap.kext). On the other hand, if you are using pcie adapter for bluetooth and wifi, you need to use USBMap(without Intel BT).kext (DO NOT FORGET TO RENAME TO USBMap.kext).

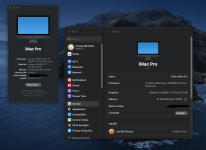
Result without Intel bluetooth USB Port:

IORegistryExplorer​


System Report​


NOTE:
If you use with Intel BT kext, USB1,2 and USB3,4 are mapped as USB 2.0
 

Attachments

  • USBMap(with Intel BT).kext.zip
    2.4 KB · Views: 7
  • USBMap(without Intel BT).kext.zip
    2.3 KB · Views: 3

Pabo

Donator
Donator
Joined
Sep 2, 2020
Messages
107
Build Spec
  • CPU: AMD Ryzen 9 3900X
  • Motherboard: 4x ASUS ROG STRIX X570-E
  • RAM: 4x Corsair Vengance 16GB 3600MHz
  • GPU: AMD Radeon RX 6950XT
  • Case: NZXT 710
  • M2 NVME: 2x Samsung 980 PRO 2TB
  • Wifi-Bluetooth: Broadcom BCM4360
  • Cooling: Corsair H115i ELITE RGB
  • Bootloader: OC 0.8.6
  • SMBios: MacPro 7,1
ACPI SSDT's - All bypassed for other OS
  • SSDT-HPET.aml (HPET _CRS (Needs _CRS to XCRS Rename))
  • SSDT-PLUG.aml (CPU power management)
  • SSDT-SBRG.aml (Correcting EC, RTC memory & IRQ conflicts)
  • SSDT-SBUS-MCHC.aml (SMBus Support)
  • SSDT-USBX.aml (USB power tables)
  • SSDT-GPU-6950XT.aml (GPU Spoof through bridge)
Kexts
  • Lilu.kext v1.6.2
  • VirtualSMC.kext v1.3.0
  • WhateverGreen.kext v1.6.1
  • AppleALC.kext v1.7.6
  • AirportBrcmFixup.kext v2.1.6
  • SmallTreeIntel82576.kext v1.0
  • LucyRTL8125Ethernet.kext v1.1.0
  • AppleMCEReporterDisabler.kext
  • BlueToolFixup.kext v2.6.4
  • BrcmFirmwareData.kext v2.6.4
  • BrcmPatchRAM3.kext v2.6.4
  • AMDRyzenCPUPowerManagement.kext v0.7.1
  • SMCAMDProcessor.kext
  • RestrictEvents.kext v1.0.9
  • NVMeFix.kext v1.1.0
  • RadeonSensor.kext v0.3.1
  • SMCRadeonGPU.kext v0.3.1
  • USBMap.kext - ASUS ROG STRIX X570-E with wifi-bluetoth pcie card
  • IntelBTPatcher.kext v2.2.0 (Disabled by default)
  • IntelBluetoothFirmware.kext v2.2.0 (Disabled by default)
BIOS Settings
  • Enter BIOS -> Press Delete -> Enter Setupv1.0
  • Exit -> Load Optimised Defaults
  • Ai Tweaker -> Ai Overclock Tuner -> D.O.C.P.
  • Advanced -> APM Configuration -> Power On By PCIe -> Disabled
  • Advanced -> PCI Subsystem Settings -> Above 4G Decoding -> Enabled
  • Advanced -> PCI Subsystem Settings -> Re-Size BAR Support -> Disabled
  • Advanced -> USB Configuration -> Legacy USB Support -> Auto or Disabled
  • Boot -> Boot Configuration -> Fast boot -> Disabled
  • Boot -> CSM -> Launch CSM -> Disabled
  • Boot -> Secure boot -> OS Type -> Windows UEFI mode
  • Boot -> Secure boot -> Key Management -> Clear Secure Boot Keys
Install Notes
Using PlistEdit Pro, Xcode or ProperTree add your details by modifying the following
1126595787_Screenshot2020-01-16at19_25_01.png.890a13d93c1ce4f42ee7dedb6d156e1e.png

WIFI / BLUETOOTH

IF NOT USING A BROADCOM INTEL-WIFI PCI-E CARD

If you are using internal Intel wifi-bluetooth, use Intel wifi-bluetooth kext. Just enable the two intel-related entries under Kernel -> Add and disable the two entries which start with Brcm.

DO NOT USE MY USB MAP KEXT due to different mapping, this one is only for people who had broadcom wifi-bluetooth pcie card. If you have it into USB3_4, then, change it to USB1_2. Use the provided one

GPU

IF NOT USING AMD RX 6X50 (XT) SERIES

Remove EFI/OC/ACPI/SSDT-GPU-6950XT.aml and remove it from conflig.plist ( ACPI -> Add ).

IF NOT USING AMD RDN2 GRAPHIC CARD

Remove agdpmod=pikera from bootflags.

CPU

IMPORTANT - PATCH INFO FOR SETTING THE CORRECT CORE COUNT FOR YOUR CPU
Core Count patch needs to be modified to boot your system. Find the two algrey - Force cpuid_cores_per_package patches and alter the Replace value only.

Changing BA000000 0000/BA000000 0090* to BA <CoreCount> 0000 0000/BA <CoreCount> 0000 0090* substituting <CoreCount> with the hexadeciamal value matching your physical core count.

Note: The three different values reflect the patch for different versions of macOS. Be sure to change all three if you boot macOS 10.13 to macOS 12

See the table below for the values matching your CPU Core Count.

CoreCountHexadecimal
6 Core06
8 Core08
12 Core0C
16 Core10
32 Core20
So for example a 6 Core 5600X would result in these replace values, BA 06 0000 0000/BA 06 0000 0090
Or a 12 Core 5900X that I have it setup as standard would result in these replace values, BA 0C 0000 0000/BA 0C 0000 0090

EFI DOWNLOAD
Good work! I would like to try it. Does sleep and awakening work correctly? For my GPU Radeon RX 5700XT should I set agdpmod = ignore? Thanks
 
Last edited:
Back
Top Bottom
  AdBlock Detected
Sure, ad-blocking software does a great job at blocking ads, but it also blocks some useful and important features of our website. For the best possible site experience please take a moment to disable your AdBlocker.