You should have generated custom SSDT-EC.aml and SSDT-USBX.aml for your system by now. You should not still be relying on Generic SSDT's such as SSDT-EC-USBX-DESKTOP.aml given the amount of time you have been using your Hack and visiting this site. Use Corpnewt's SSDTTime script and your system DSDT.aml to generate these two SSDTs and replace the generic SSDT.
SSDT/DSDT hotpatch attempts. Contribute to corpnewt/SSDTTime development by creating an account on GitHub.

github.com
Here is a guide to generating the custom SSDTs.
You don't need OpenVariableRuntimeDxe.efi with your B550/R5 5600/RX660XT system. I would remove this driver from your OC setup.
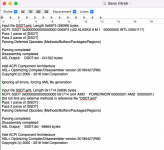
The version of Airportitlwm.kext are you using in your OC setup is v2.2.0. This version will not work with Sonoma.
Each version of macOS requires a different kext for the Intel WiFi/BT card to work. Sonoma requires the Alpha v2.3.0 release kext.
- If you are using the v2.2.0 release for Ventura, then you shouldn't have any issues installing a more recent release of Ventura, such as 13.6.1. That kext would be no use when installing Sonoma.
- You are using v2.2.0 release for the Intel Card so it won't work in Sonoma.
- You using the latest Intel Bluetooth and Broadcom BlueToolFixup.kext so your BT module would work with Sonoma, if they were in the correct order in your config.plist.
- The three Bluetooth kexts should be placed in the following order in your config for best results.
- IntelBluetoothFirmware.kext
- IntelBTPatcher.kext
- BlueToolFixup.kext
I would question the accuracy of your UTBMap.kext/Contents/info.plist and the USB ports that are being activated in your system.
Your ASRock ITX motherboard contains the following USB ports and headers.
- 1 x USB 2.0 Header (Supports 2 USB 2.0 ports)
- 1 x USB 3.2 Gen1 Header (Supports 2 USB 3.2 Gen1 ports)
- 1 x Front Panel Type C USB 3.2 Gen2 Header
- 1 x USB 3.2 Gen2 Type-A Port (10 Gb/s)
- 1 x USB 3.2 Gen2 Type-C Port (10 Gb/s)
- 4 x USB 3.2 Gen1 Ports
- 1 x USB2 Internal port serving M.2 Bluetooth module
This means your motherboard contains 21 or 23 x USB ports, depending on whether the Type-C header is Type-c with switch (9) or Type-C without switch (10).
It doesn't contain any USB2 physical ports on the rear I/O plate, so you shouldn't have any ports set as USB2 (0) in your kext, but you do!
You should have 16 x ports set as USB3 (3). This would include:
- 6 x physical USB3 ports and 6 x virtual USB2 ports served from the 6 x physical ports on the rear I/O plate. All 12 ports should be set as USB3 (3).
- 2 x Physical USB3 port and 2 x USB2 virtual ports served from motherboard header, connected to 2 x case front USB3 ports. All 4 ports should be set as USB3 (3).
Internal Headers:
- 2 x USB2 Internal ports served from the USB2 motherboard header, connected to USB2 case front ports, a USB card reader or other USB2 device. These 2 x ports should be set as Internal (255) not as USB2 (0).
- The Type-C header can be either with or without switch. The way to tell which port you have is by doing the following:
- Inserting a Type-C device in to the case front port, note which port is highlighted,
- Remove the Type-C device, flip it 180° and reinsert it in the Type-c connector,
- If the same port is highlighted then the connector is a Type-c with Switch (9).
- If a different port is highlighted then the connector is a Type-c without Switch (10).
- In both cases there will be a single or pair of Virtual USB2 ports available from the connector, which should be discovered and set with the same connector type as the physical connector.
Make the changes listed above and maybe you will be able to upgrade macOS to 13.6.1 or Sonoma.